Hello everyone, Leo Liang of Sinriya.
I’ve seen it all in my time working at the epicenter of the world of home materials in Foshan. I’ve spent time strolling through hundreds of project sites with architects, fought with designers over the subtleties of material longevity, and helped procurement managers find that sweet spot of quality and cost. We live and breathe aluminum, or at least the decorative profiles that put the icing on the cake in a room at Sinriya. But I’ve learned that regardless of how good the product, it’s only as good as its application.
One of the most frequently overlooked aspects of any tiling project is the outside corner trim. It might seem like nothing, but this one little detail will take a project from “good” to “flawless.” It’s the crisp, clean line that defines a room, the protector of your tile edges, and the unsung hero of a pro look. I’m pulling back the curtain today and sharing, from my own experience, the seven pro ways to install aluminum tile trim. This is not a technical guide; it’s a series of observations I’ve gathered in the field, written to allow you to achieve an end result that you can be proud of.
Why Does the Perfect Trim Determine Your Tiling Project’s Success?
While we’re on the cusp of grabbing one tool, let’s talk about why. Why become so obsessed about a thin piece of metal? From a B2B perspective, the answer is three-pronged: durability, beauty, and perceived value. For our business customers in the hospitality or high-traffic commercial settings, bare tile corners are a tremendous risk. An properly set aluminum edge trim is akin to rugged armor, preventing chipping and chipping damage from natural wear and tear, which equates to cost savings in the long term on repairs.
Aesthetically, the trim is punctuation on a design statement. It provides a smooth, intended transition that leads the eye and sets off the tile work beautifully. A poorly executed corner with ragged grout lines or wavy edges screams amateur work, reducing the overall quality of a costly installation. In contrast, a perfectly mitered, flush-mounted trim shouts precision and high-end craftsmanship. This is the difference between a project which exists and a project which inspires. This philosophy is central to Sinriya. We don’t simply deliver a product; we seek to deliver the knowledge which will enable it to create a better outcome. That shared wisdom is what builds trust and enduring partnerships with the designers and builders we serve.
Are You Choosing the Proper Armor for Your Tiles?
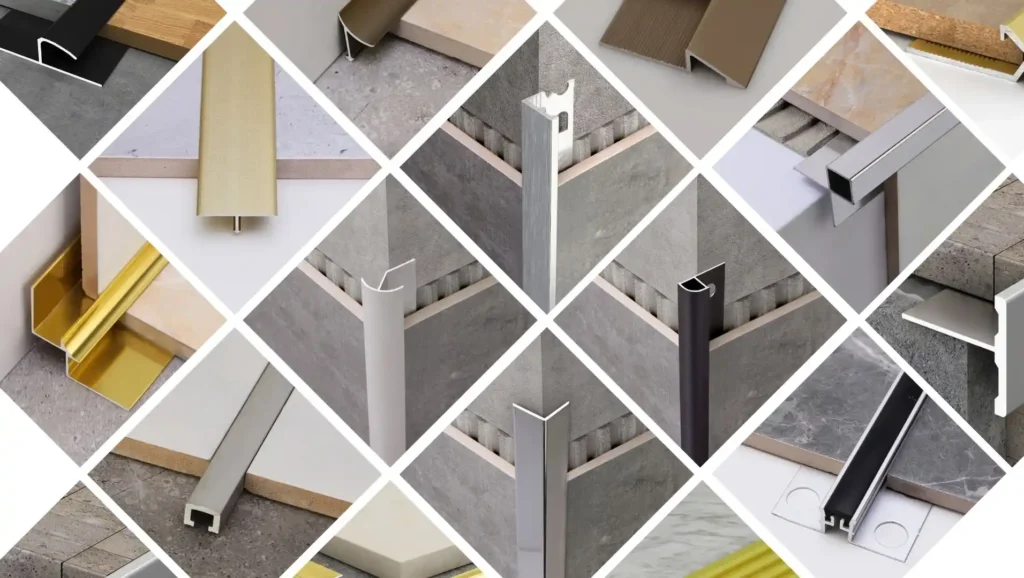
The initial, and likely most critical, step happens long before you ever mix a little bit of mortar. Selecting the correct trim is science. You must consider the profile, the material, and the size in proportion to your specific project.
First, the profile. The top three most commonly used are the L-shape (or square edge), the round edge (or quadrant), and the T-shape transition strip. Square edge profile is the design favorite for a minimalist, clean, modern look. Round edge profile is best for high-traffic applications or where you’re forced to round an edge for safety reasons.
Now, the material itself. For the majority of interior and some exterior uses, 6063-T5 aluminum alloy is our industry standard recommendation at Sinriya. It provides a great balance of corrosion resistance, strength, and extrudability, which makes it possible to have complex profile shapes. It is also lightweight and simple to fabricate on-site. For applications requiring even greater strength, a 6061 alloy would be an option. The finish is also crucial—finish options such as anodized, powder-coated, or brushed finishes make the trim either match or become a specific design highlight.
Lastly, the size. A common breakdown point. The height of the trim must be chosen in relation to the thickness of the tile. A common mistake is choosing a trim the same size as the tile. Pros know. You need to always select a trim 1-2mm above your tile to account for the thickness of adhesive beneath it. As an example, with a 10mm thick tile, you would select an 11mm or 12.5mm trim so that it will fit nicely flush and safe to finish.This little detail is critical to the entire installation.
What Happens Before the First Cut? The Unsung Hero of Installation
With the trim in mind how it should be, the urge is to go ahead and start cutting and fitting right away. But seasoned pros know that prep work makes up 90% of the job. The installation is best with a strong foundation of thorough prep work.
Gather your tools first. Do not improvise. For the cleanest, most precise cuts on aluminum, nothing beats a miter saw equipped with a non-ferrous metal cutting blade (one with a high tooth count). While a hacksaw and a miter box can work in a pinch, they require immense skill and patience to achieve a perfect 45-degree miter joint, and the finish is rarely as clean. You’ll also need a measuring tape, a level, a notched trowel for the adhesive, a rubber mallet, and some sandpaper or a file to smooth any burrs after cutting.
Second, prepare the surface. The floor or wall upon which the trim and tile will be laid needs to be clean, level, and dust- and debris-free. Any imperfections in the substrate will show up through to the final install, and it won’t be possible to get the tiles and trim to lie flush.
Lastly, and this is a step most DIYers overlook, do a dry fit. Place your trim pieces and tiles without adhesive. This enables you to see how it lays out, double-check your measurements, and imagine where any difficult cuts or adjustments near corners or obstructions will have to be made. That is where you’ll spot any potential problems, such as finding a wall isn’t square, which will mean you need to make your miter cuts a bit smaller. Paring away these 30 minutes to organize ahead of time will spare you hours of wasted material and aggravation down the road.
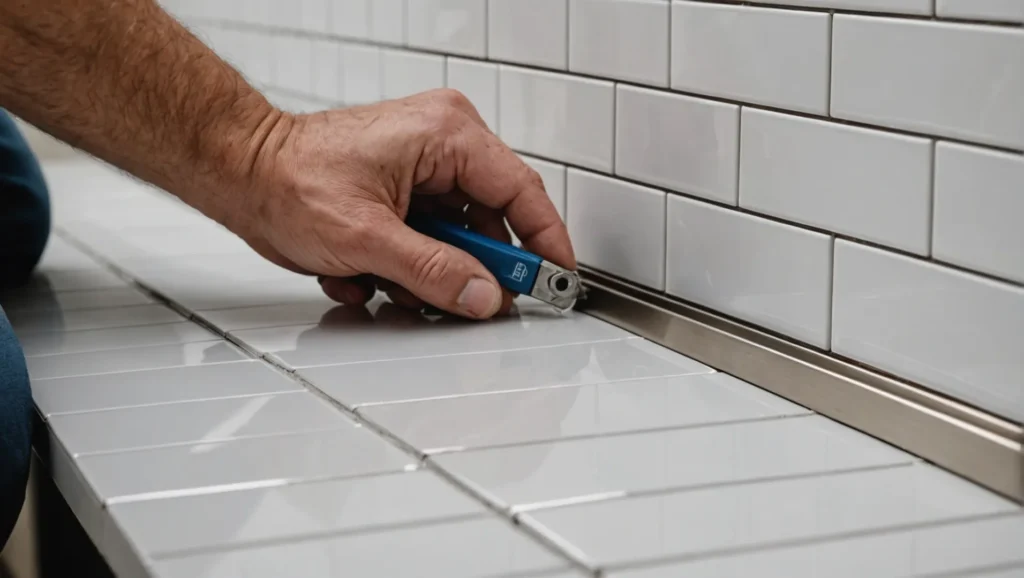
How Do You Get Those Sharp, Perfect Miter Joints?
The corners are where a professional install really shines. A clean, seamless miter joint is stunning, and a gapped, misaligned one is an immediate eyesore. This precision is achieved by your measuring and cutting approach.
First, measure twice, cut once. That’s the old motto here. Measure the length of the edge you’re going to trim and mark the trim solidly with a pencil. If you’re marking for an outside corner, remember your two pieces will meet at a 45-degree angle.
Now to the cutting. If you’re lucky enough to have a miter saw, set the blade to exactly 45 degrees. Securely hold the aluminum trim to the saw fence so that it does not move when cutting. If a piece of scrap wood is put against the trim as a backer, it can be supportive and create a cleaner, more even cut with less chance of burring. Let the saw cut; do not force it. The ideal outcome will be achieved using a slow, consistent stroke.
If a hacksaw is required, a miter box is not something you can do without to achieve the proper angle. Hold the trim securely in the box and use a fine-toothed metal-cutting blade. Take it slow and carefully with steady strokes. Upon making any cut, regardless of the tool used, there will be tiny burrs on the edge. Use a fine-grit sanding paper or a metal file to carefully smooth out these edges. This small step is important since even the slightest burr will keep the two mitered pieces from sitting tight in one another, resulting in a gap. Try your two cut pieces together, holding them together; they should make a perfect, tight 90-degree angle with no light coming through the seam.
What Is the Secret to an Unbreakable Trim-Tile Bond?
Now we move to the installation itself. Here, the goal is to create a monolithic unit where trim, adhesive, and tile are all one piece. The secret is to embed the trim into the adhesive bed correctly.
First, choose the right bonding material. Although some tile adhesives (mastics) can be suitable for wall work in dry areas, for floors and any areas that get wet like bathrooms or kitchens, a good thin-set mortar is preferable. Thin-set mortar makes a much better stronger, more durable, and watertight bond, which the quality and long-term usability of the installation require.
With your notched trowel, spread a thick bed of thin-set mortar onto the corner or edge where the trim will be placed. Now place your cut piece of aluminum trim and force its perforated anchoring leg down into the mortar bed. The perforated leg is the secret to a strong mechanical bond. Tilt it back and forth slightly so the mortar will force up through the holes. Use your level to make sure the trim is just plumb (up-and-down) or level (side-to-side). This is a critical check point. A plumb trim off will toss your entire tile layout off.
Once the trim is installed and securely embedded, you can lay the first row of tiles. Apply more mortar to the substrate beside the trim and tap the tiles firmly in place, ensuring they are tightly fitted to the trim’s edge. You will be leaving a small, even gap (typically 1/16\\” to 1/8\\”) between tile and trim itself—the grout will later fill it. Use a rubber mallet to tap the tiles into the mortar to ensure they are well bedded and flush with the top of the aluminum trim.
How Do You Grout Without Ruining the Finish of the Trim?
The work is nearly complete, but that grouting can be where you either complete the whole thing in great style or completely mess everything up so that it detracts from your work. Using aluminum trim, the goals are to have a perfect grout line and to seal the trim’s surface.
Finally, allow the thin-set mortar to set completely according to the manufacturer’s instructions. This will be a minimum of 24 hours. Rushing here will result in the tiles shifting and loose installation.
When you’re ready to grout, mask the exposed surface of the aluminum trim with painter’s tape. This is one pro tip that I always recommend. It only takes a couple minutes extra but provides excellent protection against the abrasive sand in the grout scratching the aluminum and makes cleanup much simpler.
Apply the grout with a grout float, pushing it into the joints between the tile and into the little space you made between the tile and the trim. Hold the float 45 degrees to the joints so they’re filled all the way. Once you’ve filled the joints, use the float to remove most of the excess grout from the tops of the tiles. After the grout has dried a bit (once more, as per the manufacturer’s timeline), use a damp sponge to remove the excess haze from the tiles. Clean with gentle pressure and frequently change the water in the sponge. Be careful not to get too close to the trim. When the surface is clean, you can peel off the painter’s tape carefully to find a virgin, scratch-free trim and a perfect grout line.
What Are the Final Touches That Yell Professionalism?
There is no ending. The final touches are cleaning, checking, and perfecting every detail. This final touch is the difference that makes a good job an outstanding job.
All high-grade aluminum trims, including Sinriya, ship with a transparent protective coating on the decorative face. Keep it on for as long as possible throughout the entire installation process—cutting, setting, and even grouting—to provide maximum protection. Now is the perfect moment to gently remove it. It’s always a satisfying moment to view the clean, unmarred finish beneath.
Then do a final quality check. View the lines from multiple angles. Inspect to ensure all of the grout joints are uniform and fully filled. Check the surface with your hand to make sure the tile and trim are flush. Inspect your mitered corners carefully to make sure they are secure and smooth.
Lastly, do a final cleaning. There may be a bit of grout haze that re-emerges as the surface dries. A clean, dry microfiber cloth is usually sufficient to buff this off. For any stubborn residue on the aluminum trim, a soft cloth and a mild, non-abrasive cleaner would be applied. Avoid any abrasive pads or strong chemicals, as they’ll destroy the anodized or powder-coated finish. It’s these small, last-minute touches—the gentle reveal, the detailed inspection, and the final polish—that ensure the project not only looks professional on opening day but will continue to work and amaze for many years to come.
Evasive Maneuvers: A Pro’s Final Word of Advice on Tile Trim
In wrapping up the seven most crucial steps, I want to leave you with some final thoughts learned from experience. A successful installation is as much about not doing the wrong things as it is doing the right things.
The most frequent error I see is selecting the wrong size trim.Remember the golden rule: trim height should be slightly greater than tile thickness to provide space for the adhesive. On second worst list, and right behind the first one, comes improper cutting. Gapped miters or rough-cut edges are a dead giveaway to a DIY project. Wasting money or renting the proper miter saw with a metal-cutting blade is more than worth it for the finish quality.
Another disastrous mistake is not seating the trim’s anchoring leg into the mortar all the way. The trim should not just sit on top; it should be mechanically seated in the adhesive bed to provide the structural protection that it’s supposed to. Lastly, rushing the job is an accident waiting to happen. It can be omitting the dry-fit, not letting the mortar harden, or getting careless when cleaning up, but slackness leads to errors that can be difficult and costly to reverse.
My advice to all architects, designers, and installers that I deal with is to treat the tile trim as anything but an afterthought, but rather a integral component of the floor or wall system. When you give it the respect and consideration that it is due, it will give back to you a finish that is beautiful, long-lasting, and absolutely professional. That is the Sinriya way, and one I encourage you all to adopt.
References:
- The Spruce: “How to Choose the Correct Tile Adhesive or Mortar”
- Fine Homebuilding: “Choosing a Tile Adhesive”
- RUBI Blog: “How to Fit Tile Trim: Choosing the Right Trim and Installation”
Focus Keywords:
- Aluminum Tile Trim
- Install Tile Edge Trim
- Tile Corner Trim
- Miter Cut Trim
- Sinriya Aluminum